
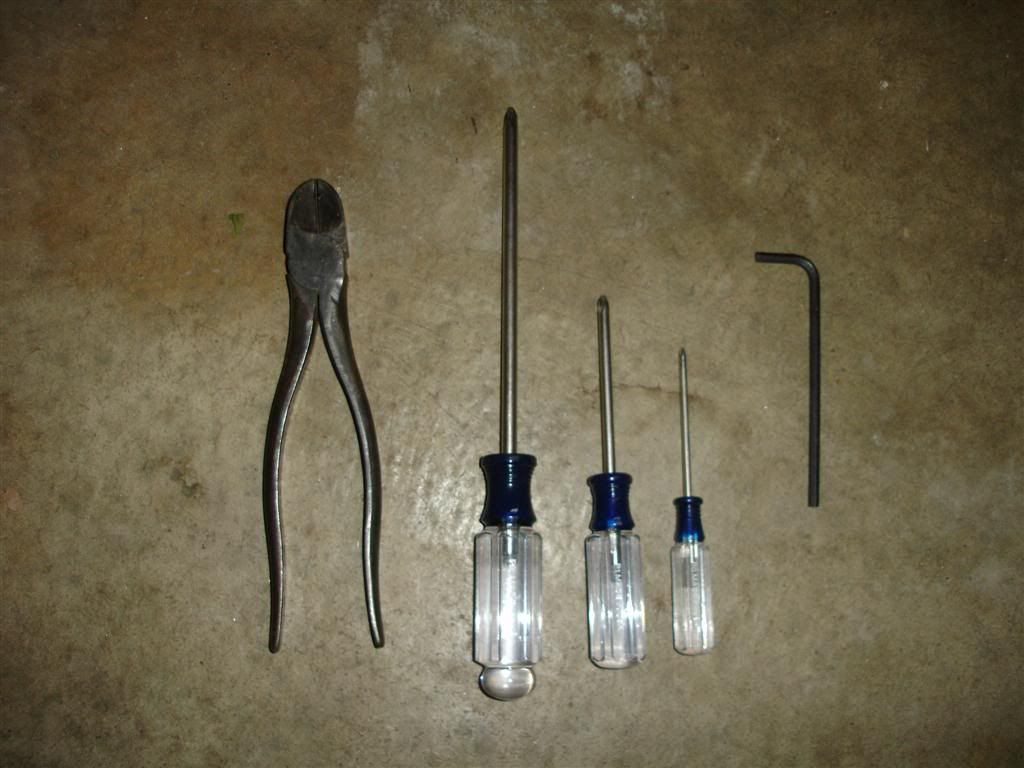
 Tools needed:
- Phillips #0, #1, #2
- Diagonal cutters
- 4mm Allen wrench
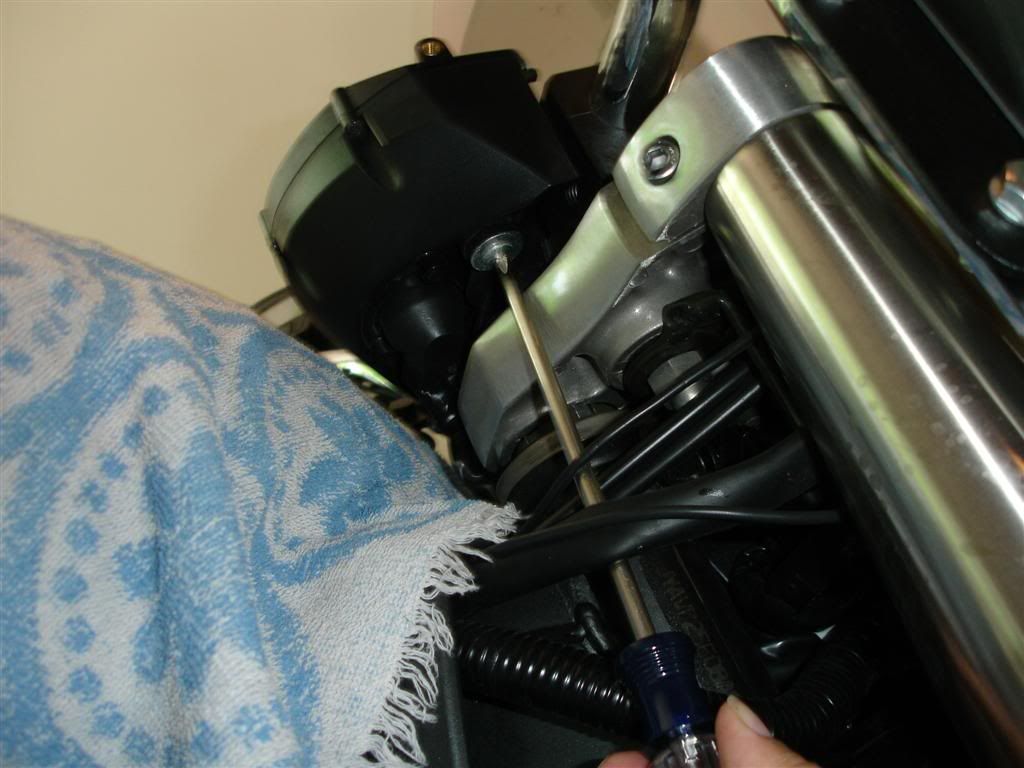
- Cover tank with protective towel or blanket
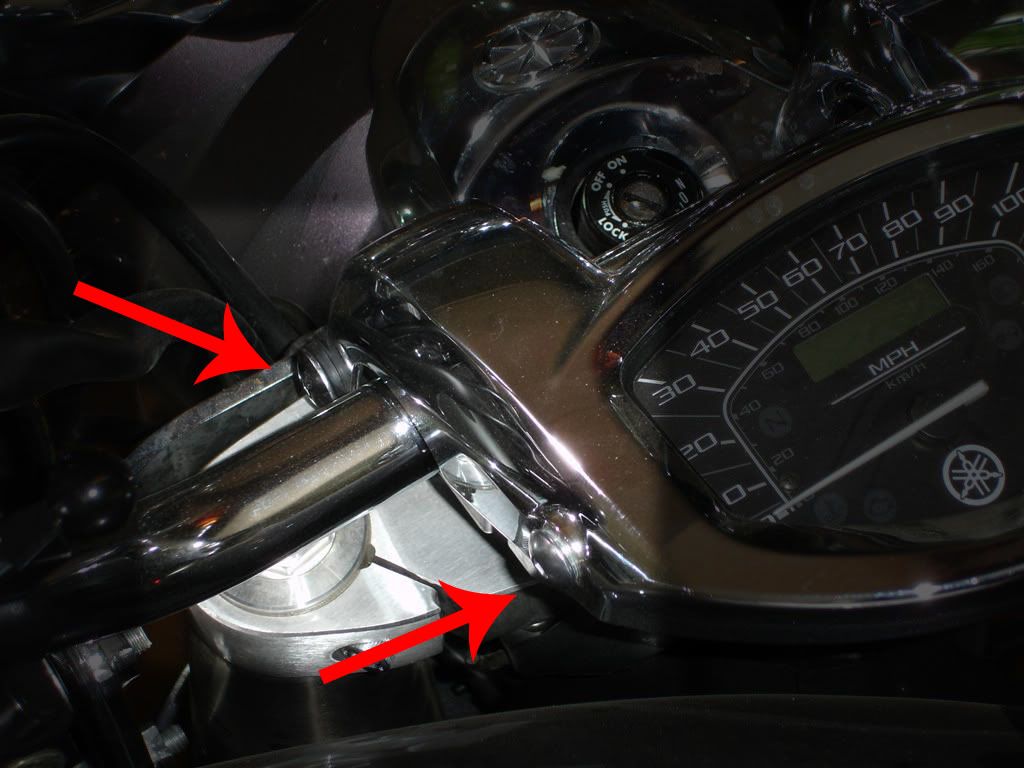
- Remove plastic chrome meter bezel using 4mm Allen wrench. Remove 2 front, 2 rear 4mm button head bolts. Careful not to lose the rear rubber grommets or front metal collars.
- Using long-reach Phillips #2 screwdriver, remove two truss head screws (one each side) connecting meter unit to handlebars. Left side note: carefully remove zip tie affixing wire bundle to holder with diagonal cutters.

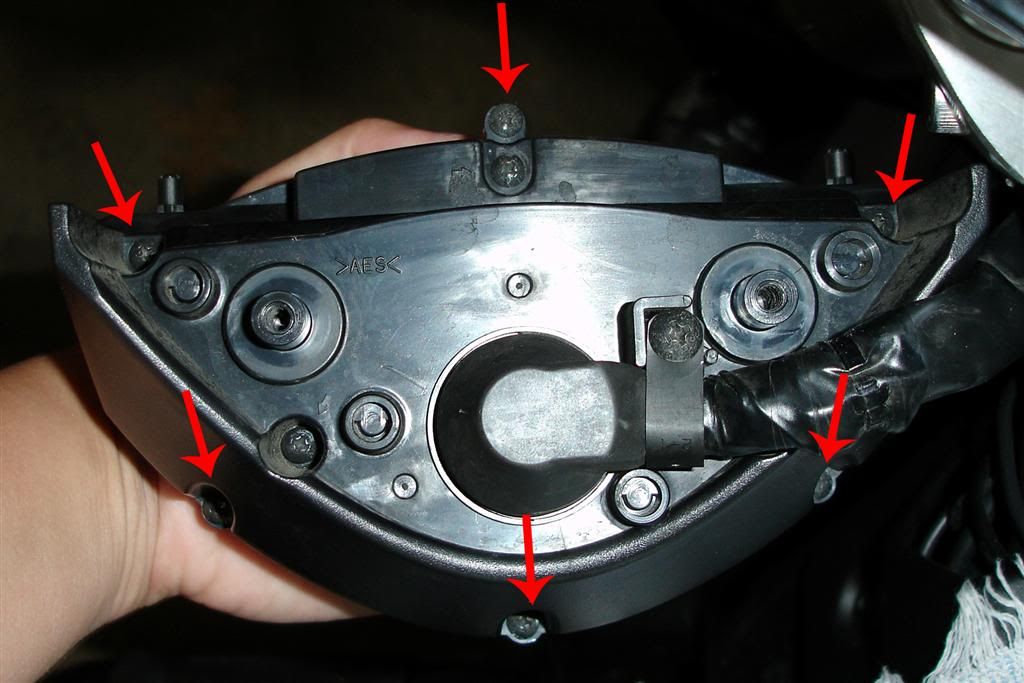
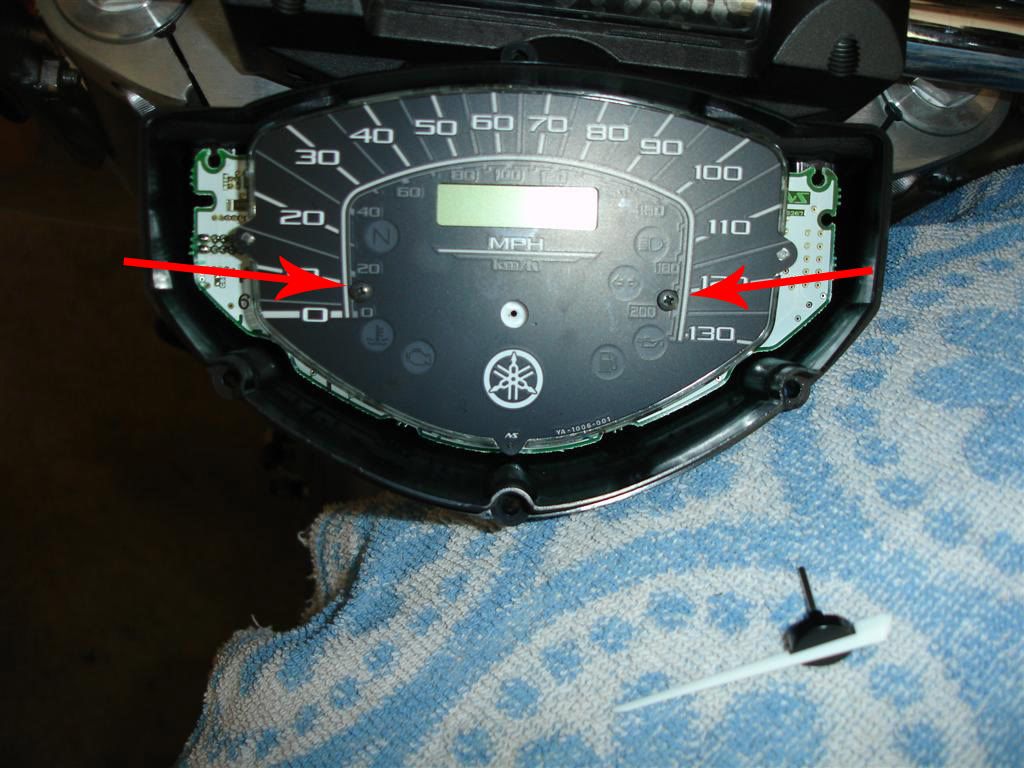
- Remove the following six Phillips #1 screws. (Do not remove two recessed or wire bundle stay.)
- Four around unit perimeter (one top, three bottom)
- Two at upper corners
- Black plastic housing will come off. Careful not to lose the rubber seal between the two halves.
- Pull off speedometer needle.
- Remove two speedometer dial screws using a Phillips #0. Pull off OEM dial face and set aside; it will not be reused.
- Place custom dial face in unit, secure with the two Phillips #0 screws. Be sure to remove any fingerprints or smudges before securing.
- Reinsert needle and key ignition to “ON” position, allowing needle to sweep. Note where needle lands and readjust if necessary by removing and reinserting needle.
- Reinstall the housing with the six Phillips #1 screws (4 perimeter, 2 corners). Be sure black rubber seal is properly seated.
- Reinstall meter unit from underneath with the 2 truss head screws.
- Reinstall plastic chrome meter bezel using 4mm Allen wrench.
- Go for test ride, and enjoy!

