Pages

Lock your Lid!

Here's another innovative idea from the guys at Kewl Metal: Kewlocks.  Most bikes have their helmet holder in a rather inconvenient spot.  The Kewlocks place them in an easy-to-reach spot - right at the end of your handlebars!

Not only do these sweet looking chunks of chrome look good and lock your lid, but they also function as bar end weights.

These attach to the ends of Kuryakyn grips (Iso, Flame, Transformers) and are sold either singly or as a pair ($70 est).

More Lights - Rear Visibility!

I love this piece! Super easy install - took less time than installing fender tips! The Kuryakyn Triple Whammy lights up the backside as a run-turn-brake controller.  The turn signals gain another use as rear red running lights, and illuminate steady or modulated when the brake is applied.

Click below for video.......

DIY Driver's Backrest

Took a piece of mild steel flat stock and banged the bloody heck out of it over an I beam. The backrest bracket is sandwiched between the fender and the driver seat rear anchor.

Need to trim the corners off and grind it down, and I think I'm going to coat it with that Plasti-Dip from Harbor Freight. Otherwise, I think it is perfect!


__________________

Tint your windshield!

Well, did hubby's windshield today. A cool $14 mod that really made him smile.

Bought a roll of adhesive window tint from the local Pep Boys. This is 35% VLT (visible light transmitted). My "Butterfly" is a lot darker, but hubby looks through his shield so it needed to be lighter. If in doubt, check with local law. Meh.

To do this you should have the following tools ready:
- Very sharp (brand new) Exacto blade
- Scotch tape
- Scissors
- Sticker On! (or liquid Dawn & water solution in a spray bottle)
- Lint-free rag
- Squeegee (or a credit card wrapped in the lint-free rag)


  1. I cleaned the windshield with Plexus (my favorite windshield cleaner) and a lint-free rag.
  2. Lay out the windshield on a clean, dust-free floor and unroll the window tint to estimate the size. As you unroll the tint, spritz a little Sticker On! or Dawn/water solution on the plastic to eliminate static cling.
  3. Cut the tint at least one full inch more than the size of the windshield itself to allow some "wiggle room" for error.
  4. Liberally apply the water solution or Sticker On! to the shield itself. You want enough water solution to be able to "float" the tint and be able to reposition it easily. Don't worry, you'll squeegee out the excess, so spritz away!
  5. Peel back the protective backing to the tint, exposing the adhesive side. Go ahead and spray the adhesive as well - it will become tacky again, trust me!
  6. Set the tint in place and begin to squeegee out all bubbles and excess water. This will take some time. Work the bubbles to the nearest edge. You may not get it all today, but that's ok. Just heat the tinted side of the windshield with a hair dryer and begin working them out later.
  7. Once you have most of the bubbles and water out, then take your very, very sharp Exacto knife to the edges. I prefer this way, but you can cut to exact shape and size before you remove the protective backing. Hold the knife at a shallow and low angle and glide over the edge of your shield. With a little practice, you should have a very well trimmed out tint.


Here's the coolness of my tinted shield

Flame Floorboard Covers (Kuryakyn)

Here's another cool idea to jazz up the drab floorboards of the V-Star lineup!  Kuryakyn makes Iso and Flame floorboard covers which are just dripping in heavy chrome!

The floaty feeling the stock boards have is now gone.

They do not seem slippery at all. I was concerned, but the rubber is very elevated, which you can't tell in any of their product pics.

I like the added space - I can move my little boot all around it now in many different positions, and there is even a lip on the back end that my feet fit nicely. However, it is that spot that concerns me for durability. I can't ride as hard in turns or I'll likely end up replacing them in a year. Don't forget, Butterfly is slammed 3", so most normal and commercially lowered 1300's might not suffer this problem. I am going to take the "curb feelers" to Fastenal or Tractor Supply to look for a half-dozen replacements to keep on hand.

Very, very minimal vibration. If it becomes bothersome, I might add some silicone to the bottom, but that's unlikely necessary.

I did find the point of scrape - and it isn't as bad as I thought. We took a ride through some beautiful twisties between SW Pa, WVa and SE Ohio, and put it to the test. Had a few good gashes on a 180* decreasing radius and another hairpin, but it was the DR that had me grinding my anti-tip peg again!!!

For the install.......

Here's what you need:
Flat screwdriver
8mm deep socket
4mm hex

Kuryakyn supplies a pair of curb feelers (installed with 8mm) and six 4mm button cap bolts and washers (install three on each side).


Use the screwdriver to pry off the OEM floorboard rubber, pushing inward and up. There are three spots the rubber anchors into the floorboards. Set the rubber pieces in the "1300 spare parts bin".


The three holes are where the Kuryakyn bolts go.


Don't forget the curb feelers, although I'm not sure they won't last long.

__

Windshield Tilt

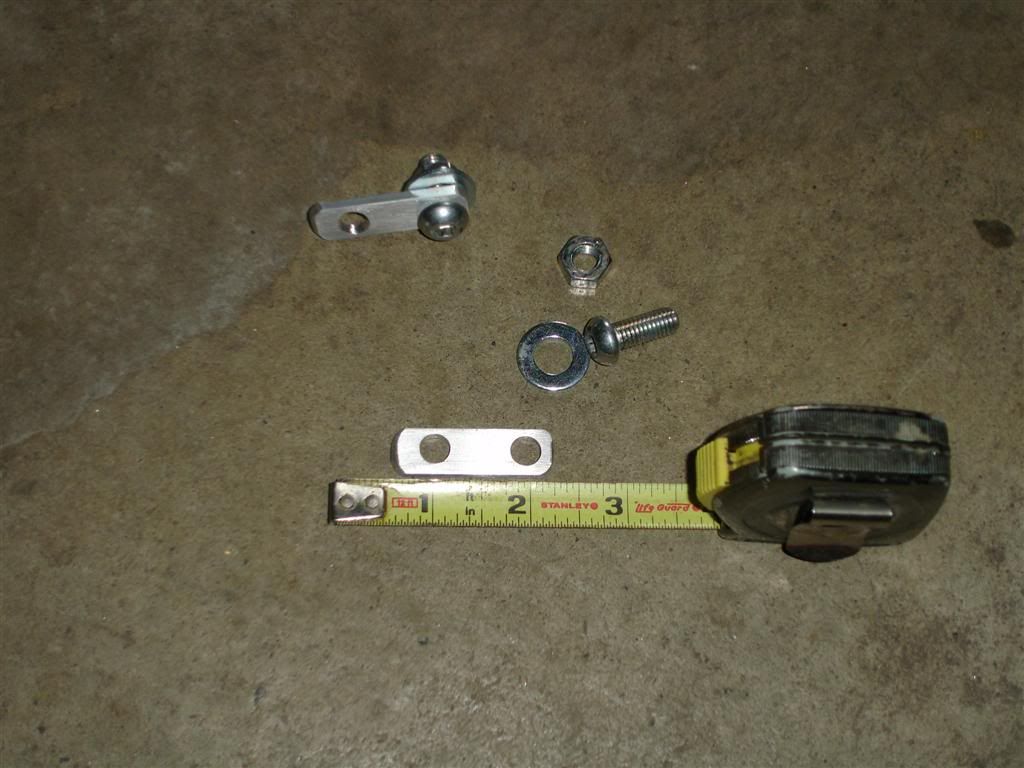
Here's a quick way to get better airflow for shorter riders.  I made a small extension piece to push forward the bottom attachment point of the windshield mount.  The holes are 1" on center. 

Here's a comparison of the tilt and non-tilted shields:

Grip diameters

Here's a quick comparison of grip sizes for the 1300, starting from
the smallest to largest...

Stock grip: 4 1/2"
Flame grip: 5 3/8"
Iso grip: 5 1/2"